Given that GPS/GNSS signals traverse nearly 20,000 kilometers from satellites to receivers, it is indeed feasible to fabricate a counterfeit GNSS signal from a terrestrial station.
ArduSimple, a leader in accessible and affordable RTK GNSS solutions for drones and robotics, highlights that this can mislead GNSS receivers regarding their actual location, a growing concern for GNSS systems utilized in aviation.

To bolster signal integrity and enable GNSS receivers to detect fraudulent signals, the European GNSS system, Galileo, has launched the OSNMA anti-spoofing service. This service guarantees secure, end-to-end communication between Galileo satellites and OSNMA-enabled receivers.
essentially, the satellite and GNSS receiver exchange a password or “key” that allows the receiver to authenticate the signal’s legitimacy. If a signal is deemed spoofed, it will be disregarded in positioning calculations.
This complete guide will assist users in retrieving and inputting the necessary keys into the Septentrio receiver to enable the OSNMA service. This process can also be applied to receivers utilizing mosaic-H and mosaic-X5 modules with the latest firmware updates.
Note: The OSNMA feature is still undergoing testing by Galileo and Septentrio, so results may vary.
Essential Equipment:
- simpleRTK3B Pro
- Budget Survey Tripleband GNSS Antenna (IP66)
- A computer or laptop
Step 1: Obtain OSNMA Service Keys
1. Access your account on the EUSPA website.
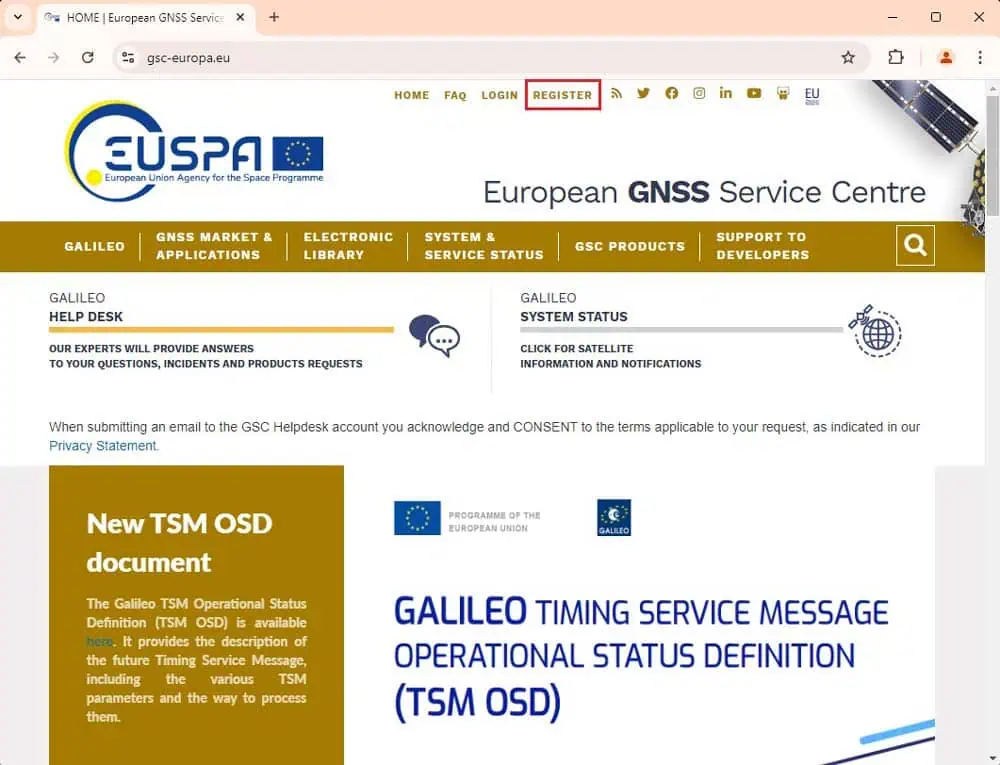
2. Go to SUPPORT TO DEVELOPERS > OSNMA PUBLIC OBSERVATION TEST PHASE and fill out the form to participate in the OSNMA Public Observation Test Phase.
- Upon registration, you will receive a confirmation email, which may take about a week. Once confirmed, you can download the necessary key.

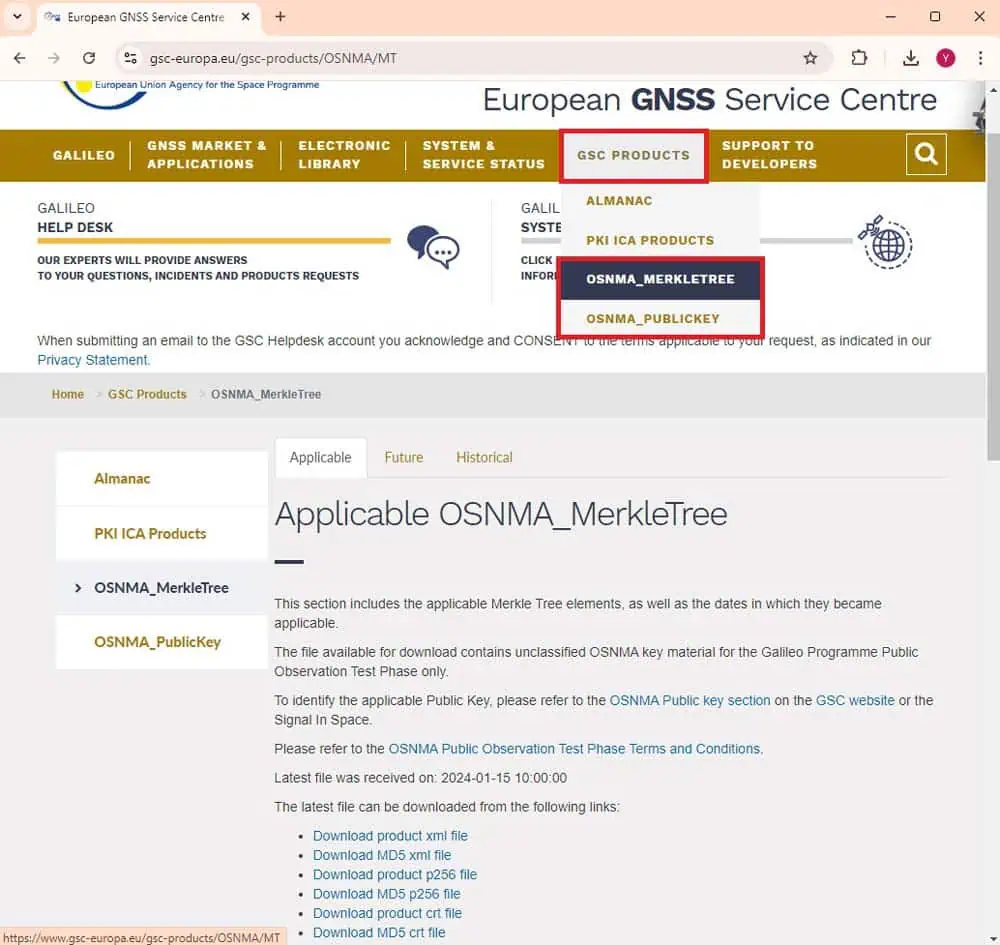
3. After receiving confirmation, proceed to:
- GSC Products > OSNMA_PublicKey to download the public key (.crt file).
- GSC Products > OSNMA_MerkleTree to download the Merkle Tree root (.xml file).
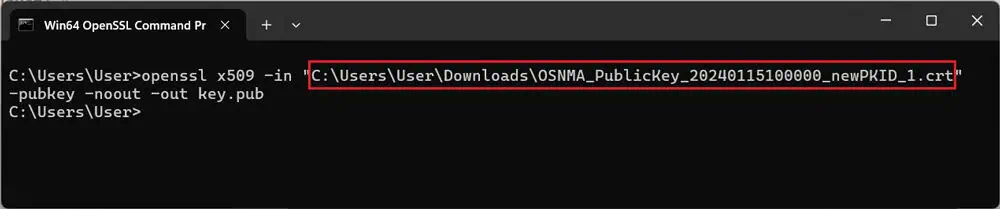
4. Convert the downloaded keys into a format that your receiver can utilize. For the public key, OpenSSL is recommended (usually pre-installed on most Linux systems and available for Windows as OpenSSL Light). To convert the key, use the following command:
openssl x509 -in “C:UsersUserDownloadsOSNMA_PublicKey_20240115100000_newPKID_1.crt” -pubkey -noout -out key.pub
Ensure you replace the folder path and key file name with those obtained in step 3.
5. Use the
type key.pub
command to check the key, or open the
key.pub
file with a text editor. It should display as an image. Copy the key for future use.

6. Ensure there are no extra spaces (CRLF) between the first and second lines of the key to prevent error messages.

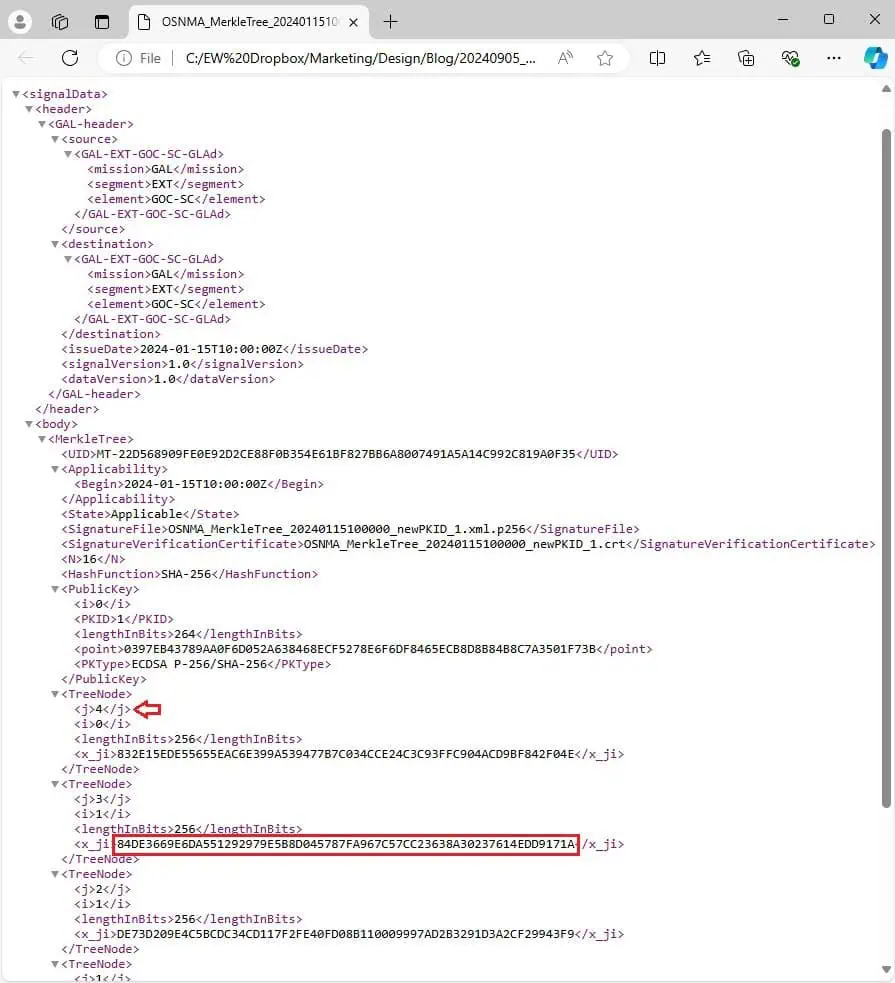
7. Open the Merkle Tree “.xml” file in a web browser by right-clicking and selecting Open with. Find the “x_ji” parameter of “treenode j4” (highlighted below).
Step 2: Set up the OSNMA Public Key and Merkle Tree Root in the Septentrio Receiver
8. Connect the receiver to your computer using the USB port labeled POWER+GPS.
9.Open a web browser and enter
192.168.3.1
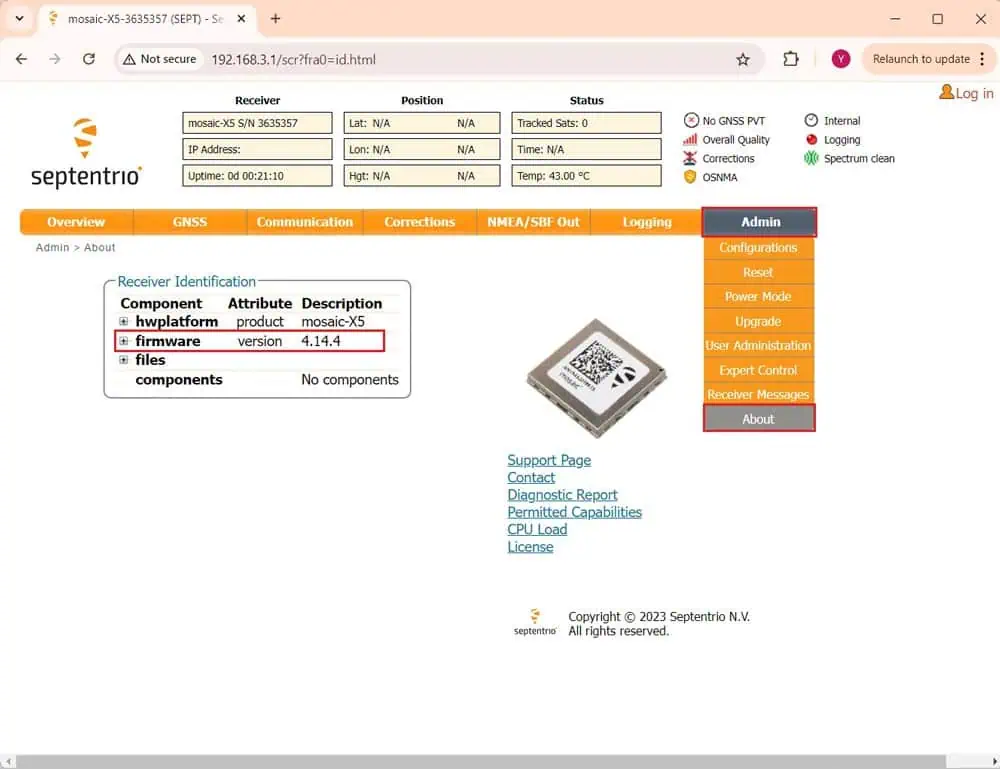
to access the Septentrio web interface. Navigate to Admin > About to verify your firmware version.
- If your firmware is version 4.14.4 or newer, continue to step 11.
10. If your firmware is older than 4.14.4, follow the provided video tutorial to update it.

11. Attach the antenna to your receiver and position it outdoors to verify functionality.
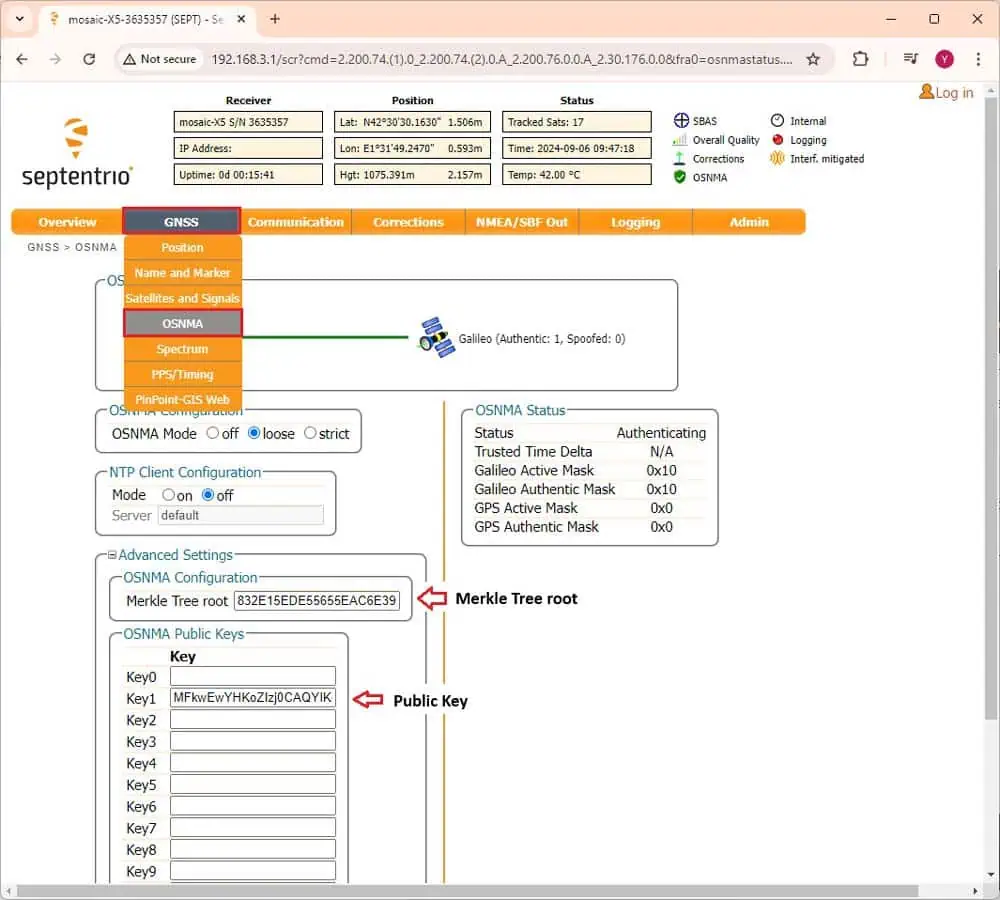
12. Go to GNSS > OSNMA. in the OSNMA configuration section, select loose, and set NTP Client Configuration to off.
- In Advanced Settings, paste the merkle Tree root from step 7 under Merkle Tree root, and paste the key obtained in step 6 under Key1.
- Click Ok and save the configuration to avoid re-entering the key in the future.
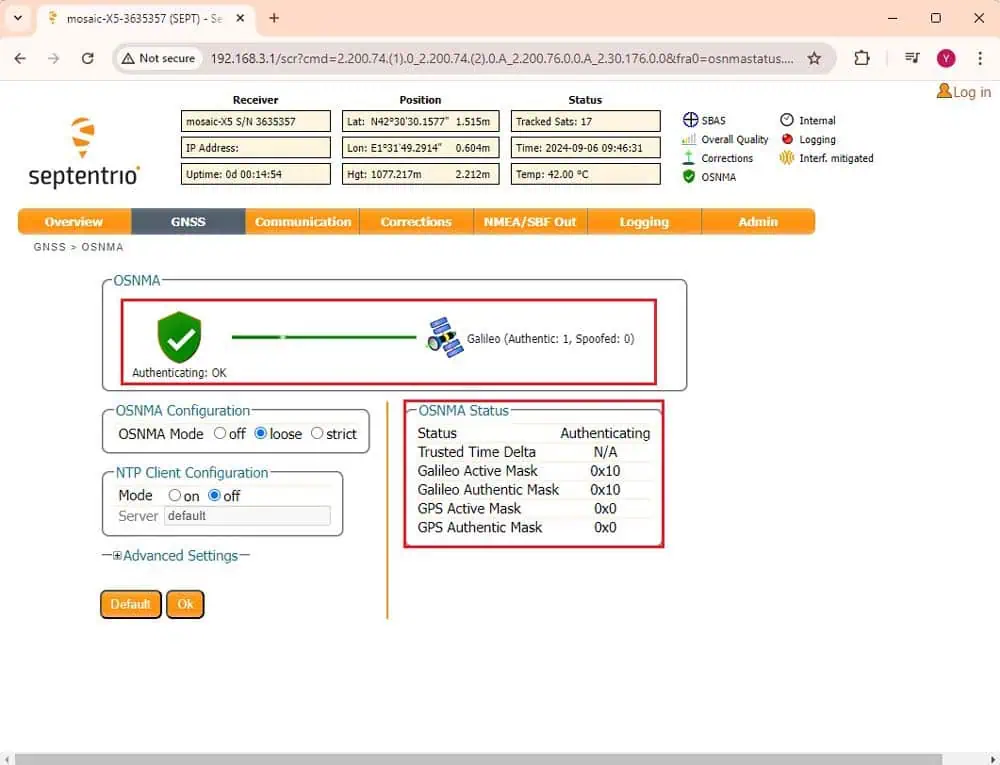
13. After a few minutes, the Status should transition from initializing to Authenticating. You can now monitor the number of Galileo satellites identified as spoofed. You are now prepared to test the OSNMA service on your Septentrio receiver.
ArduSimple supplies all the essential equipment for this guide:
- simpleRTK3B pro
- Budget Survey Tripleband GNSS Antenna (IP66)
Read the original article >>


