
In the insightful piece titled ‘How to 3D Print GIS Data From Global Mapper,’ Blue Marble Geographics illustrates the process of utilizing 3D printing alongside geospatial technologies to create detailed 3D maps through their Global Mapper software.
The latest update, Global mapper Version 25.1, features a specialized STL exporter designed to produce slicer-ready files. This enhancement leverages the software’s robust terrain processing capabilities to generate STL files accurately scaled both horizontally and vertically, with options for adding a base and sidewalls.
The following guide provides a step-by-step approach to obtaining 3D spatial data, processing it within Global Mapper, and exporting it in a format compatible with your slicer.
Step 1: Importing Data into Global mapper
For users with existing data, it can be
imported into Global Mapper by simply dragging it into the workspace or selecting File > Open.
Global Mapper supports a wide array of spatial file formats, with GeoTIFF and.las/laz being the most prevalent for 3D GIS data.
When dealing with vector data such as contour lines, lidar, or point clouds, users must first create a solid surface grid layer from this data prior to exporting.

Locating Data:
Numerous Free Elevation Data Sources are available for use in Global Mapper. The most accessible option is the built-in Online Data tool, which streams data directly into the software. A notable dataset is the NASA DEM Elevation Data, accessible under Popular Sources.
(Optional)
Modifying Terrain Data:
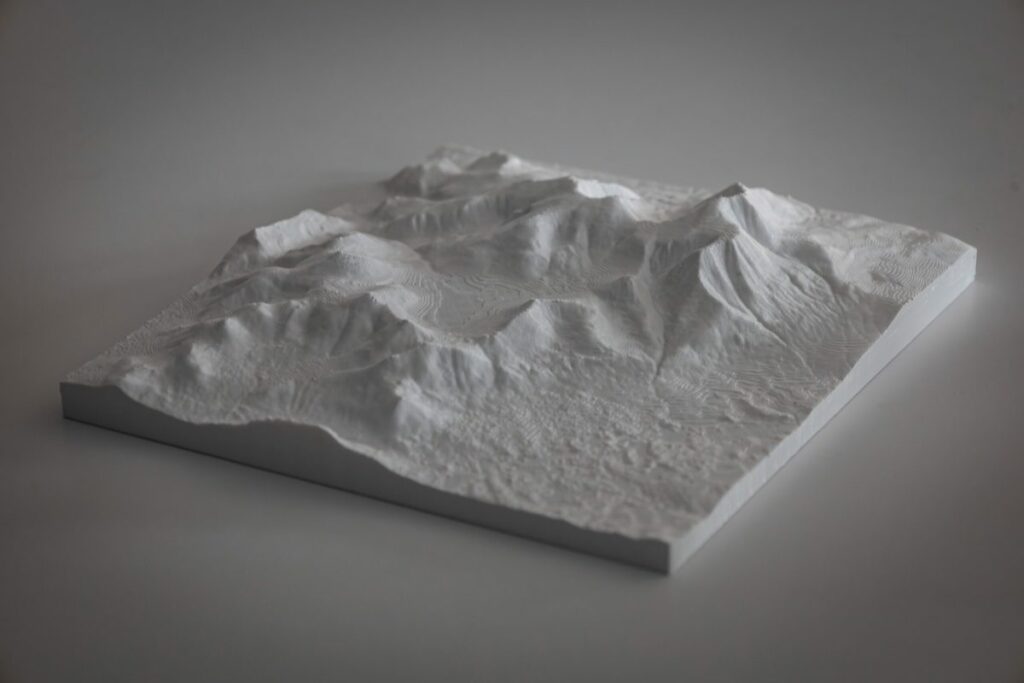
Although the exported .stl file will not retain color attributes, Global Mapper offers various visualization options to assist during editing. The elevation shader, found in the Viewer toolbar, allows users to apply color to raster data based on elevation. For a uniform white layer that resembles a solid color filament print, select the Daylight Shader.
Cropping Data:
Users can crop raster data to fit a specific polygon or area feature by utilizing the digitizer tool to draw the desired area. cropped data remains intact and can be restored by adjusting settings, but it will not be included in the export.

Terrain Painting:
For users wishing to modify specific areas of the terrain, the Terrain Paint tool allows for manual adjustments by using the cursor as a brush to edit the elevation surface in various ways. For more information, refer to this blog: How to use the new Terrain Painting tool in Global Mapper Pro.
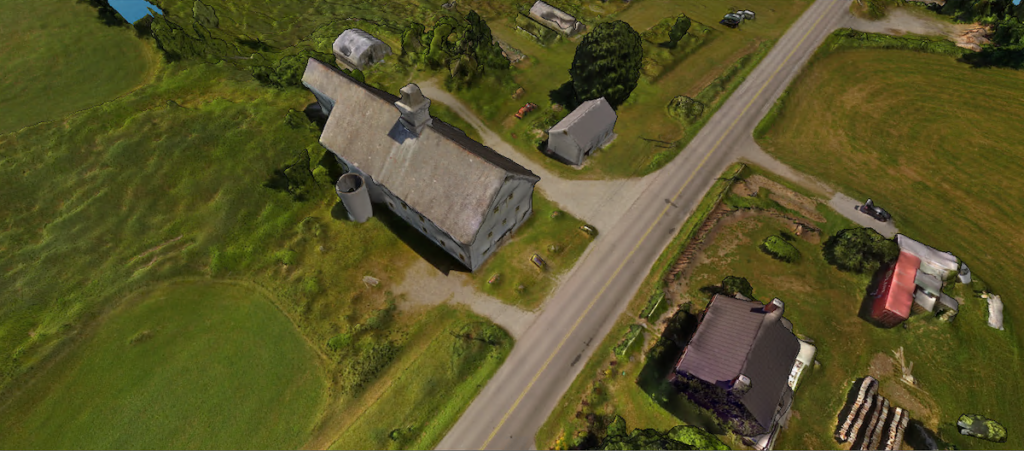
Creating 3D Models from Drone Imagery:
The
Pixels to Points
tool is a photogrammetric solution that generates 3D meshes, point clouds, and orthoimages from overlapping aerial photographs.
This tool can even be utilized to create a 3D model of your home.For further details on initiating 3D drone mapping and integrating Global Mapper with UAVs, check out our resources.
Step 2: Exporting as an STL File
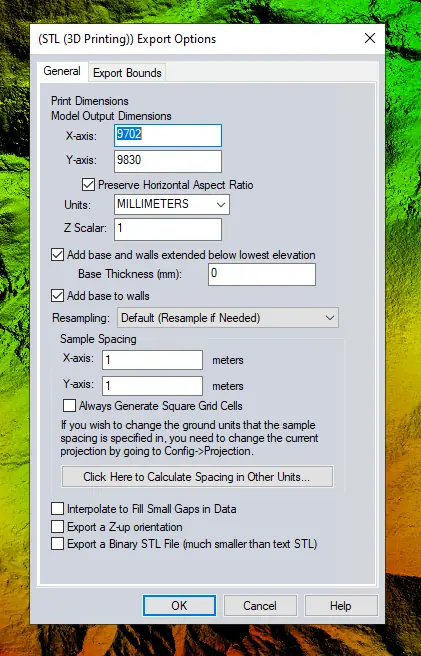
To export your data, navigate to the file menu, select Export > Export 3D Format, and choose STL (3D Printing). While Global Mapper supports various 3D file formats,the STL exporter is specifically designed to scale the data accurately to cm/mm/in. Typically, GIS data maintains its scale upon export, which is essential for its primary function. As standard 3D printers do not operate at landscape scale, the ability to downscale the data to fit a typical print bed is advantageous.
Print Dimensions:
The default horizontal dimension corresponds to the data’s real-world extent. Adjust this to fit within the 3D print bed,ensuring the Preserve Horizontal Aspect Ratio option is checked to avoid distortion.
Z Scalar (Height exaggeration):
The
Z Scalar
setting allows for height exaggeration of the model, which is notably beneficial for data from relatively flat regions. This variable is akin to the Vertical Exaggeration setting in the 3D Viewer, which is useful for visualizing the desired exaggeration. Modify this value in the 3D viewer via the Configuration menu by clicking the Wrench icon > 3D View Properties > Environment > Vertical Exaggeration.
Creating a Base:
A base is a flat surface that extends from the bottom of the model. To automatically generate a base during export, check the
add base and walls extended below the lowest elevation
option, which will also create sidewalls connecting the base to the print.
According to blue Marble Geographics, it is advisable for the base to extend below the lowest point of the print. The
Base Thickness
setting determines how far below the lowest elevation the base will be extruded. Setting this to 0 will place the base at the lowest point, potentially resulting in holes or thin areas in the 3D print depending on layer thickness. A minimum of 2mm is recommended for a sturdy base.

Sample Spacing:
for those familiar with GIS, sample spacing refers to the grid cell size of the data, which can also be viewed as resolution. A higher resolution (smaller number) results in a more detailed model but increases file size. Conversely, when scaling a large area for a print bed, a larger number (lower resolution) is more practical. For instance, modeling the Grand Canyon at a 1m resolution may yield details too fine for the final print, while a resolution of 100m or greater would be more suitable for such a vast area.
Click OK to export the data. The solid model can be previewed in Windows using the native viewer to ensure the base thickness and Z exaggeration meet expectations. The file is now ready for slicing and printing.
Discover terrain editing and exporting features in Global Mapper by downloading a 14-day free trial. For any inquiries, please reach out to Blue Marble Geographics.
Access the complete article here >>


