ArduSimple provides a extensive guide on configuring MissionPlanner and QGroundControl to relay RTK base station corrections to autopilots used in drones and robotics.
These instructions have been tested with the simpleRTK2B, simpleRTK2Blite, and simpleRTK3B GNSS receivers.For users interested in utilizing an NTRIP service, a dedicated tutorial is also available.
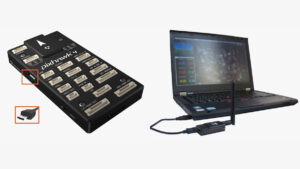
Essential Hardware:
- simpleRTK2B – Basic Starter Kit
- 2 x USB to micro-USB cables
- Holybro Pixhawk4 (or any compatible autopilot)
- A computer or laptop
Essential Software:
- Mission Planner or QGroundControl
- RTKLIB STRSVR (for QGroundControl onyl)
- MAVProxy (for QGroundControl only)
Transmitting RTK Base Station corrections to ArduPilot Using Mission Planner, QGroundControl, and MAVProxy
1. Begin by configuring your GNSS receiver as a base station.If you need assistance, consult ArduSimple’s guide on setting up the simpleRTK2B as a static base station. For the simpleRTK3B, refer to the specific instructions for its base station setup.
2. Connect the GNSS antenna to your receiver and place it in an area with an unobstructed view of the sky.
3. Link the autopilot to your computer using a USB connection or a radio telemetry link.
Mission Planner Setup
Using Mission Planner is a straightforward process, with similar steps applicable for the simpleRTK2B, simpleRTK2Blite (u-blox ZED-F9P), and simpleRTK3B (septentrio Mosaic X5) receivers.
4. Launch Mission Planner and connect to your autopilot through the designated COM port.
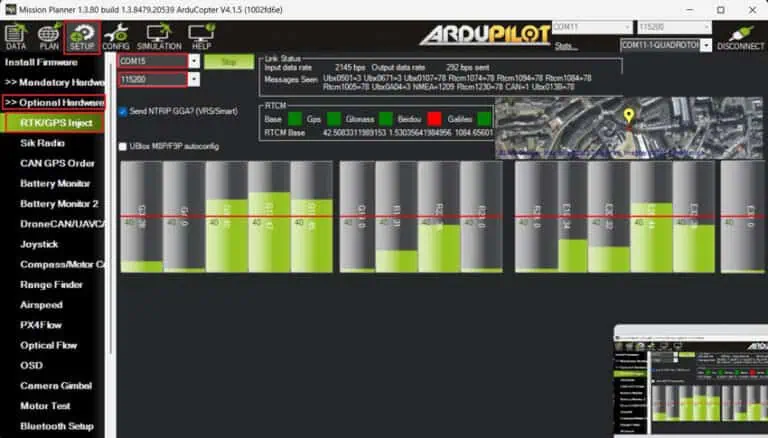
5.Go to SETUP → Optional Hardware → RTK/GPS Inject.
6.select the COM port for your GNSS base station, set the appropriate baud rate, and click Connect.
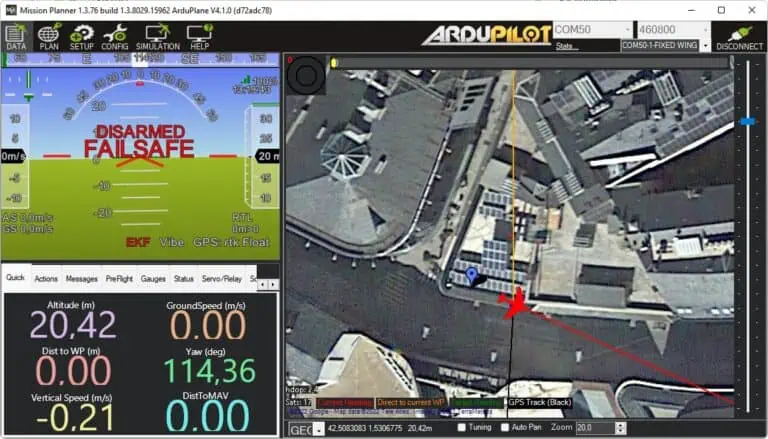
7. At this stage, you can connect your Heading kit to the autopilot by following this tutorial. Return to the main Mission Planner interface, where you will see the positions of both the base station and ArduPilot GNSS displayed.
QGroundControl Setup
QGroundControl automatically recognizes both the simpleRTK2B and simpleRTK3B boards when connected via USB to the same computer running the software. It configures the receiver automatically and starts sending corrections to the GNSS receiver on the autopilot.
However, since the automatic configuration may not always function as intended, this guide will outline an alternative method that is compatible with simpleRTK2Blite as base stations and operates reliably.
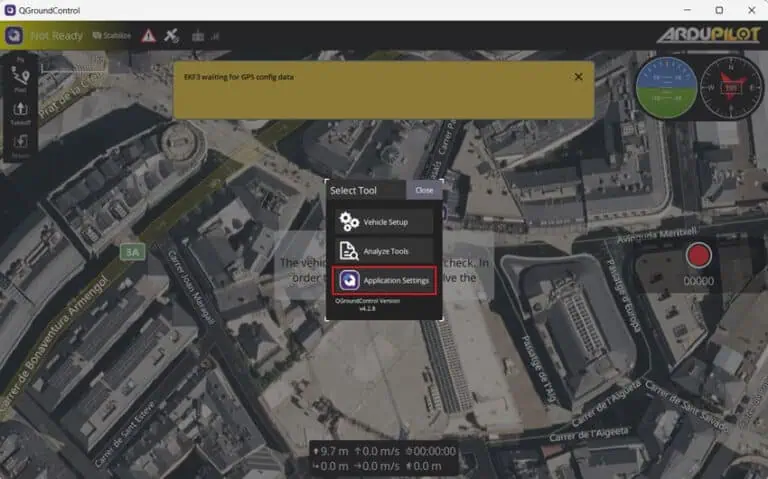
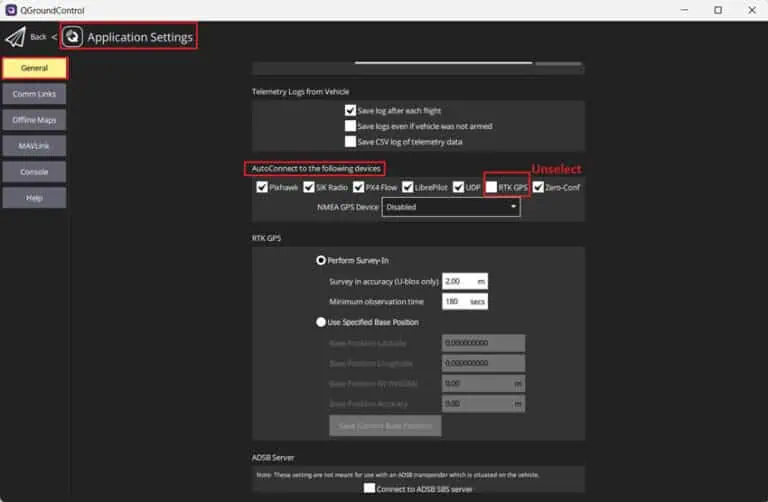
4. Open QGroundControl and access Application Settings from the main menu.
5. Navigate to General → AutoConnect to the following devices → Unselect RTK GPS.
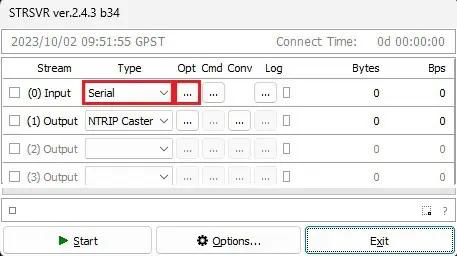
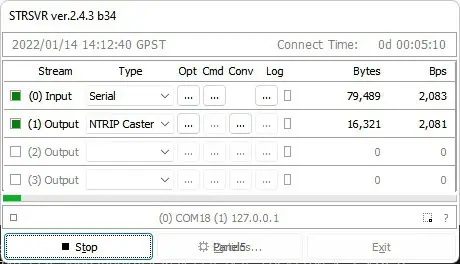
6. Launch the STRSVR application. Set Input to Serial port, then click the opt… button.
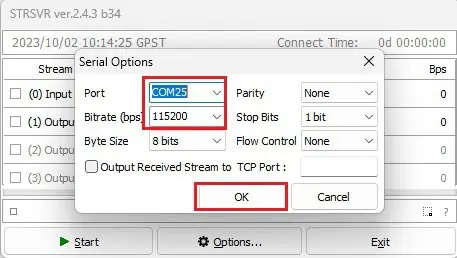
7. In the Port field, select the COM port of your GNSS base station and set the Bitrate to match your GNSS receiver’s baud rate.click OK.
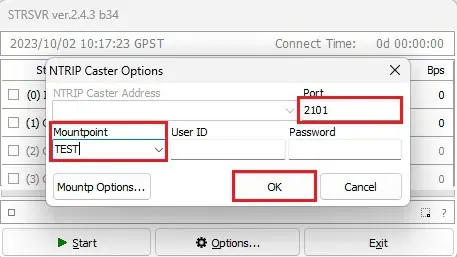
8.Choose (1) Output to NTRIP Caster and click the Opt… button.
9. Select a Port (e.g., 2101) and set the Mountpoint (e.g., TEST). Leave UserID and Password blank, then click OK.
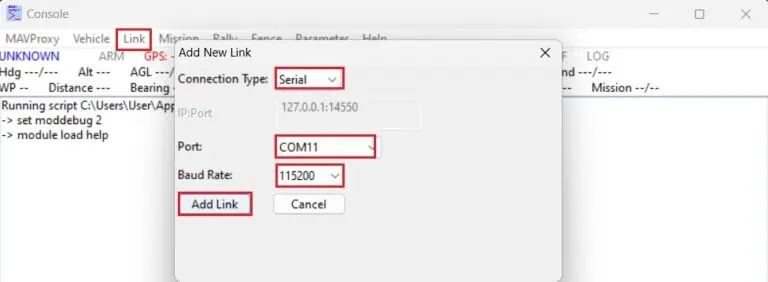
10. Start MAVProxy and navigate to Link → Add → Serial, selecting the telemetry link or autopilot COM port and configuring the Baud Rate. Click Add link.
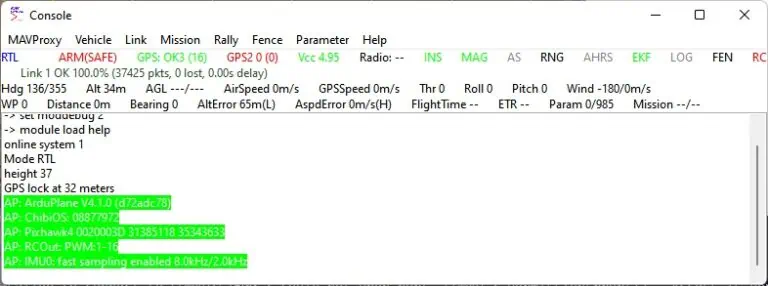
11. If the connection is established successfully, the MAVProxy interface should display information similar to the provided exmaple.
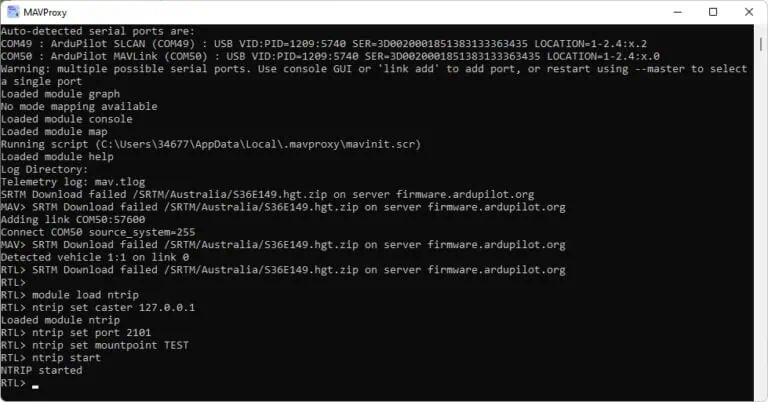
12. Access the MAVProxy terminal and input the following commands:
module load ntrip ntrip set caster 127.0.0.1 ntrip set port 2101 ntrip set mountpoint TEST ntrip start
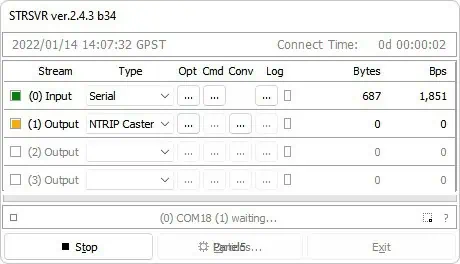
13. After completing these steps, STRSVR should indicate that data transmission is active.
14.The GNSS receiver connected to the autopilot will automatically receive RTCM messages from the base station, entering RTK fix/float mode.
ArduSimple offers all the necessary components for this tutorial:
- simpleRTK2B – Basic Starter Kit
- 2 x USB to micro-USB cables
Explore the original guide >>


